Inviting New Users to Second Nature
Last updated: April 22, 2026
Overview
Admin may invite new users to your Second Nature account via Account Settings. There are two methods of adding users: one-by-one or using a CSV file.
Inviting New Users One-by-One
TIP:
If you are inviting 10 or more users, consider skipping this section and using a CSV.
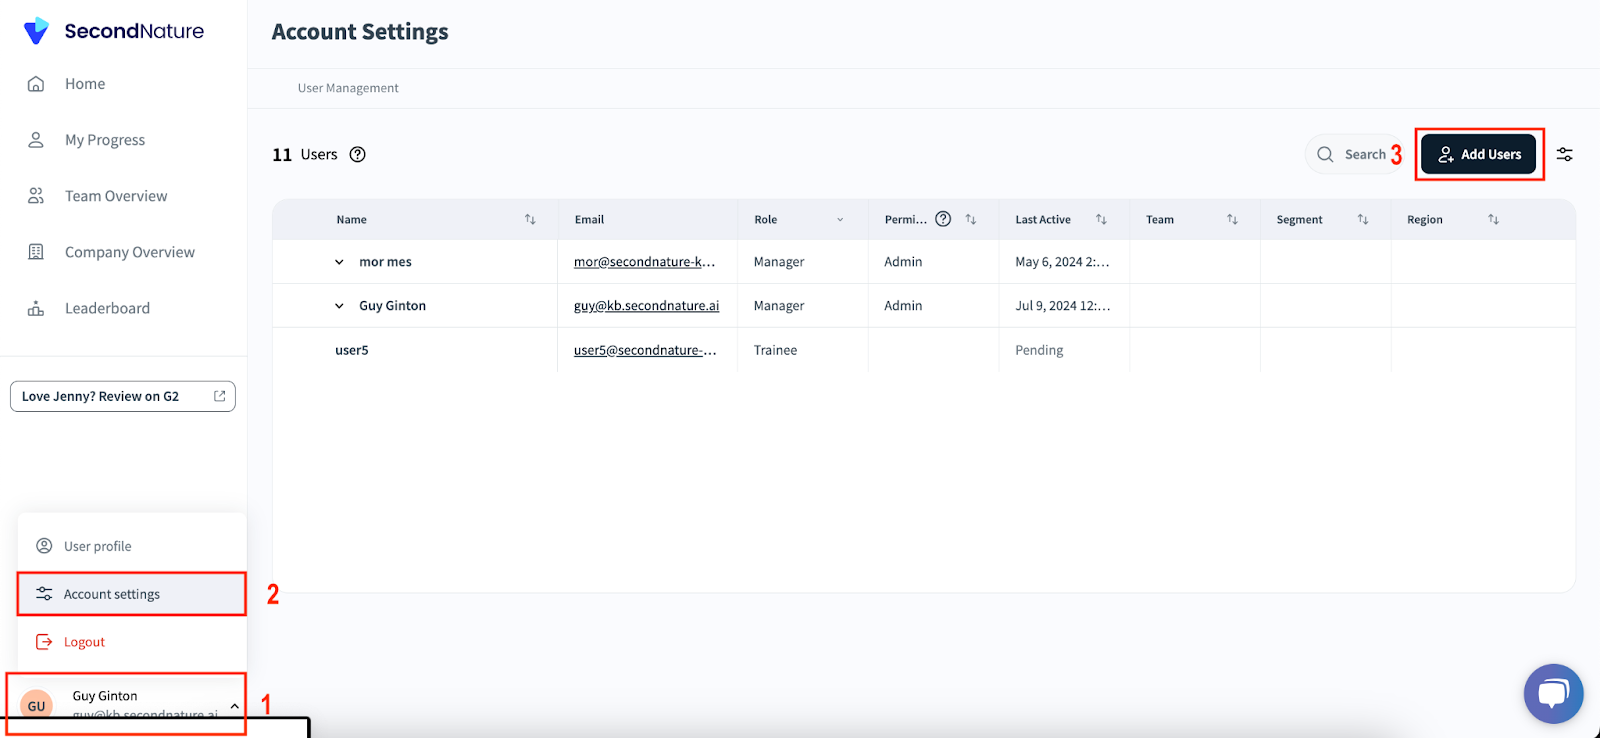
1. Within the Second Nature Homepage, click on your profile details (icon, name and email) at the bottom left corner of the navbar. This will reveal a new menu.
2. Click Account settings within this new menu to go to the Account settings page. Alternatively, simply go directly to: https://app.secondnature.ai/management/users
3. Click the Add Users button at the top right corner of the Account settings page. An Invite New Users popup will appear.
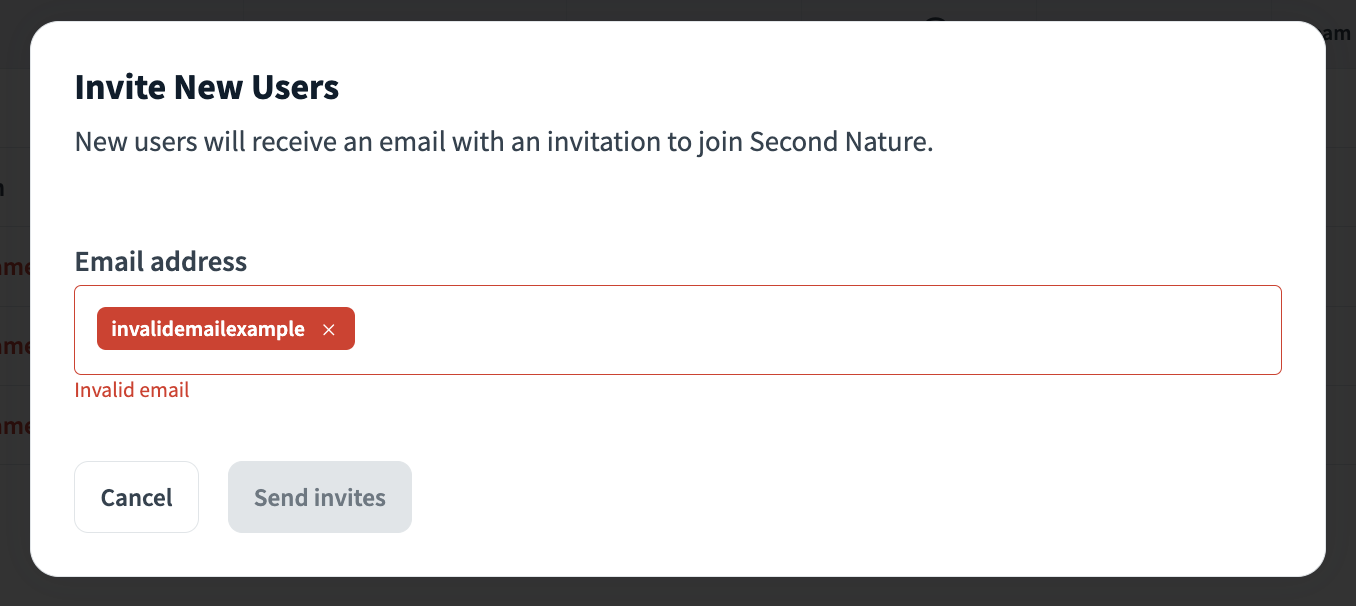
4. Within the popup, enter relevant emails for the users you wish to invite in the Email address input. You can separate these emails by commas or pressing the enter key. Press Send invites after you have confirmed all the email addresses are correct.
NOTE:
Sending invites may take a few seconds or minutes depending on your internet speed. Wait until you are redirected back to the Invite New Users page to ensure the process completes.
Invited users will receive an email to complete their registration.

NOTE:
If there is a typo with one or more email addresses, you will be prompted to correct them before you can send invites.
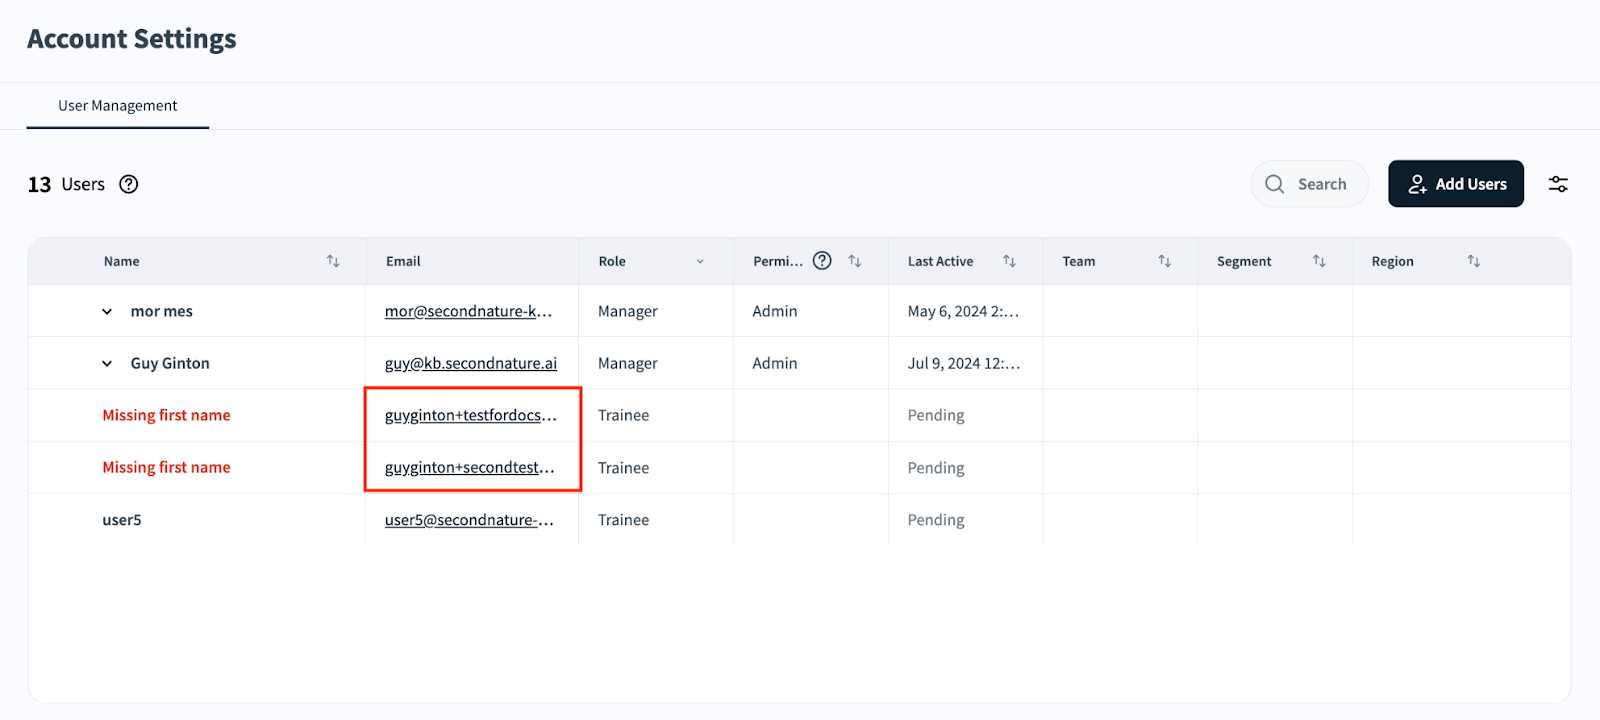
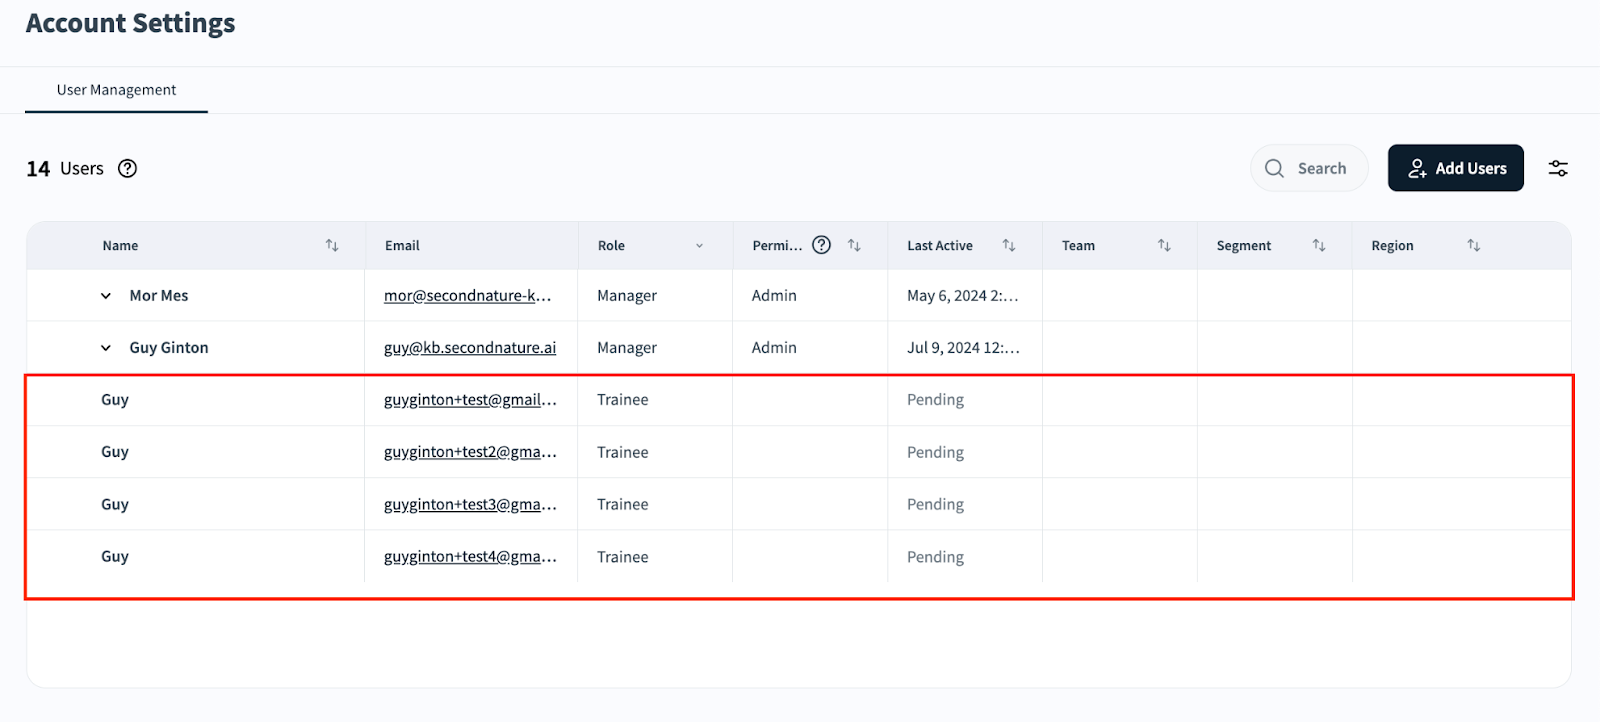
5. Within the User Management tab in the Account Settings page confirm that the recently invited users have their emails within the User Management table.
Inviting New Users Using a CSV file
This guide is relevant for inviting many users to Second Nature at once, such as when onboarding a medium or large organization.
1. Within the Second Nature Homepage, click on your profile details (icon, name and email) at the bottom left corner of the navbar. This will reveal a new menu.
2. Click Account settings within this new menu to go to the Account settings page. Alternatively, simply go directly to: https://app.secondnature.ai/management/users
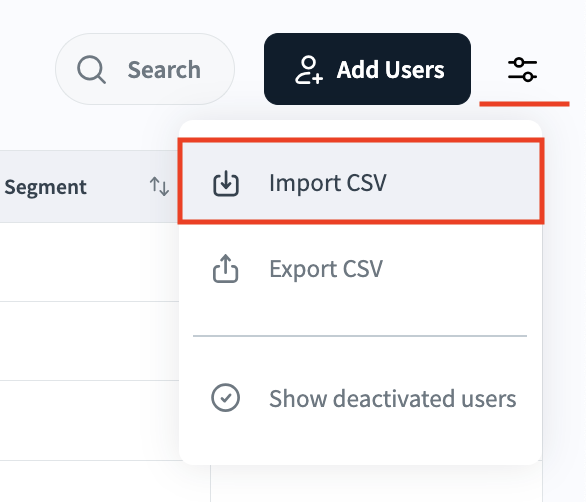
3. Click the
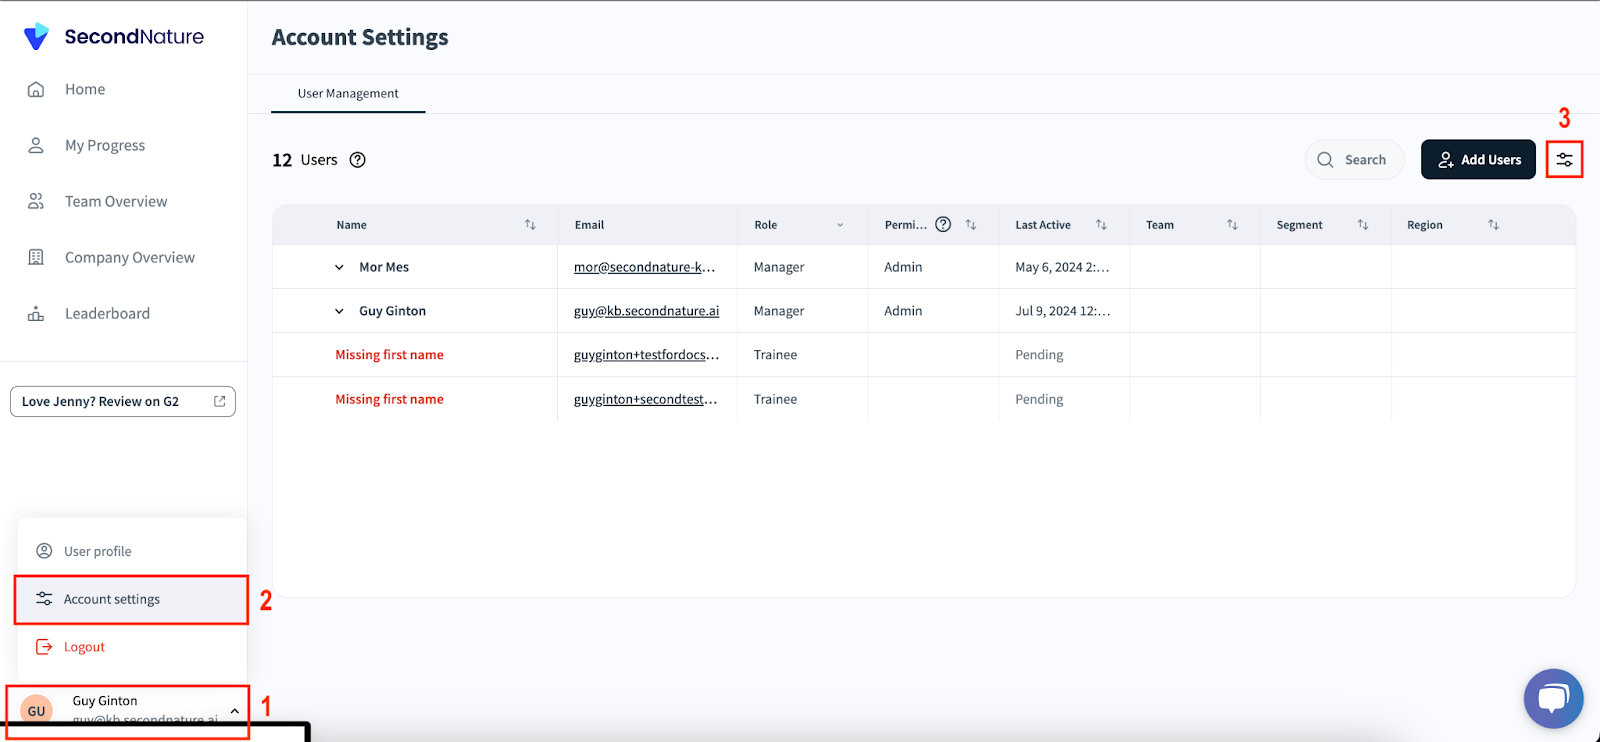
4. Within the new settings dropdown menu, click Import CSV to load the Upload Company Structure popup.
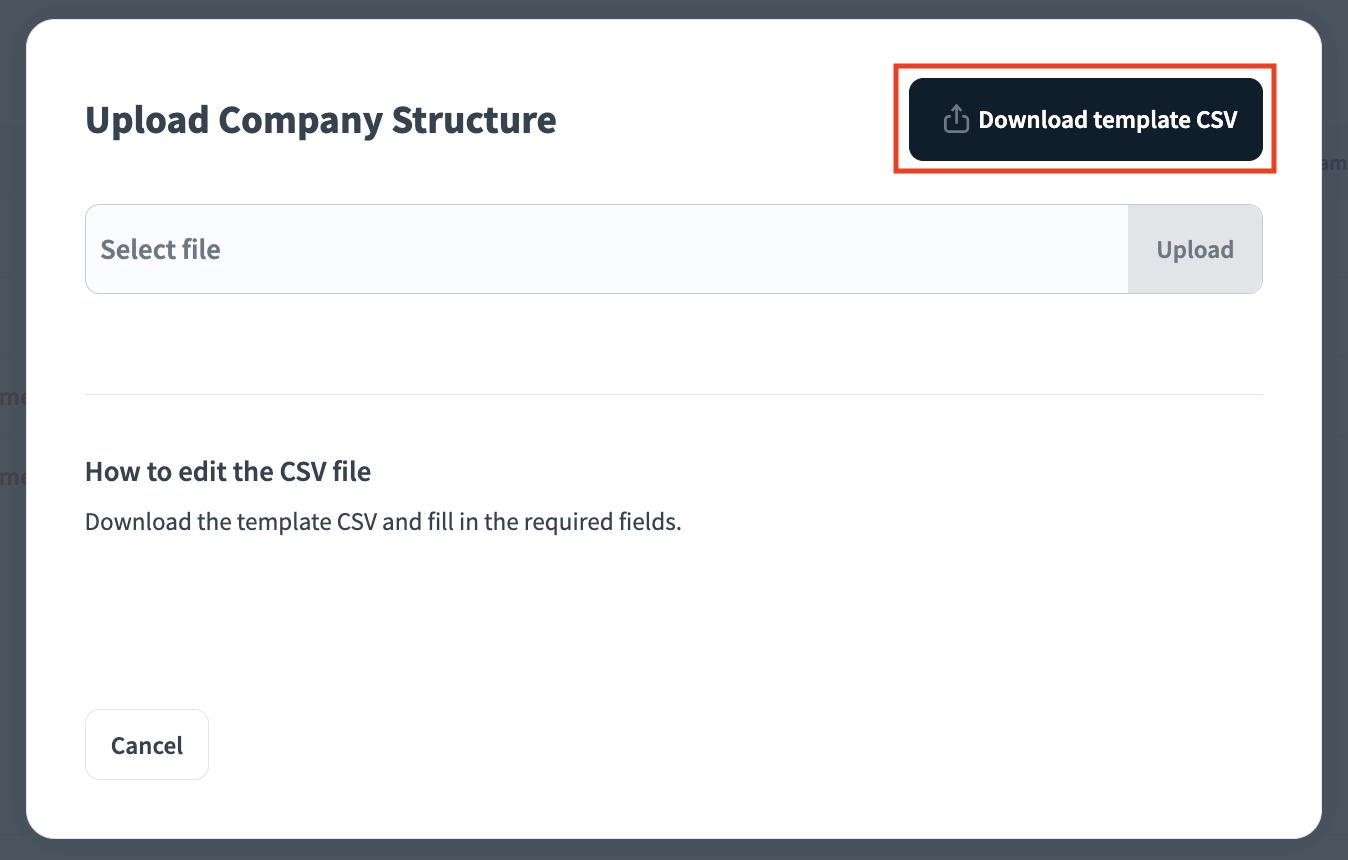
5. Within the Upload Company Structure popup, you may click Download template CSV for an example of a blank CSV will all possible fields. Alternatively, you may create a CSV from scratch using the fields described in step 6.
6. Create new CSV rows for each user containing all mandatory fields at a minimum. Mandatory fields include the following:
a. user_email: The email address of the user being invited.
b. first_name: The first name of the user being invited.
i. Names should contain alphabetic characters only, without symbols or numbers.

6b. You may add optional fields to your CSV at your discretion.
a. last_name: The last name of the user being invited.
i. If this is left blank, the user will have an opportunity to enter their last name later.
b. role: The user’s role in the company. Must be defined as trainee or manager. If this field is left blank (null) the user will be imported as a trainee.
c. permissions: Must be blank (null), admin or editor.
d. manager_email: The email address of the user’s manager.
e. team_name: The name of the team the user belongs to.
i. Teams will be created on the fly if they do not already exist.
ii. Make sure that team names have matching syntax and capitalization to avoid duplicates. Teams named “Sales” and “sales” and “sale” will not be grouped together.
f. segment: This is an optional subdivision based on your company segmentation.
i. For example, an org. may use “Sales” and “CS” as separate subdivisions, or may use “Interviewees” and “Employees.”
g. region: Another optional subdivision denoting the users’ geographic location.
i. For example, an org. may use “Americas,” “Europe,” “MENA” and “Asia,” or labels based on their office locations.

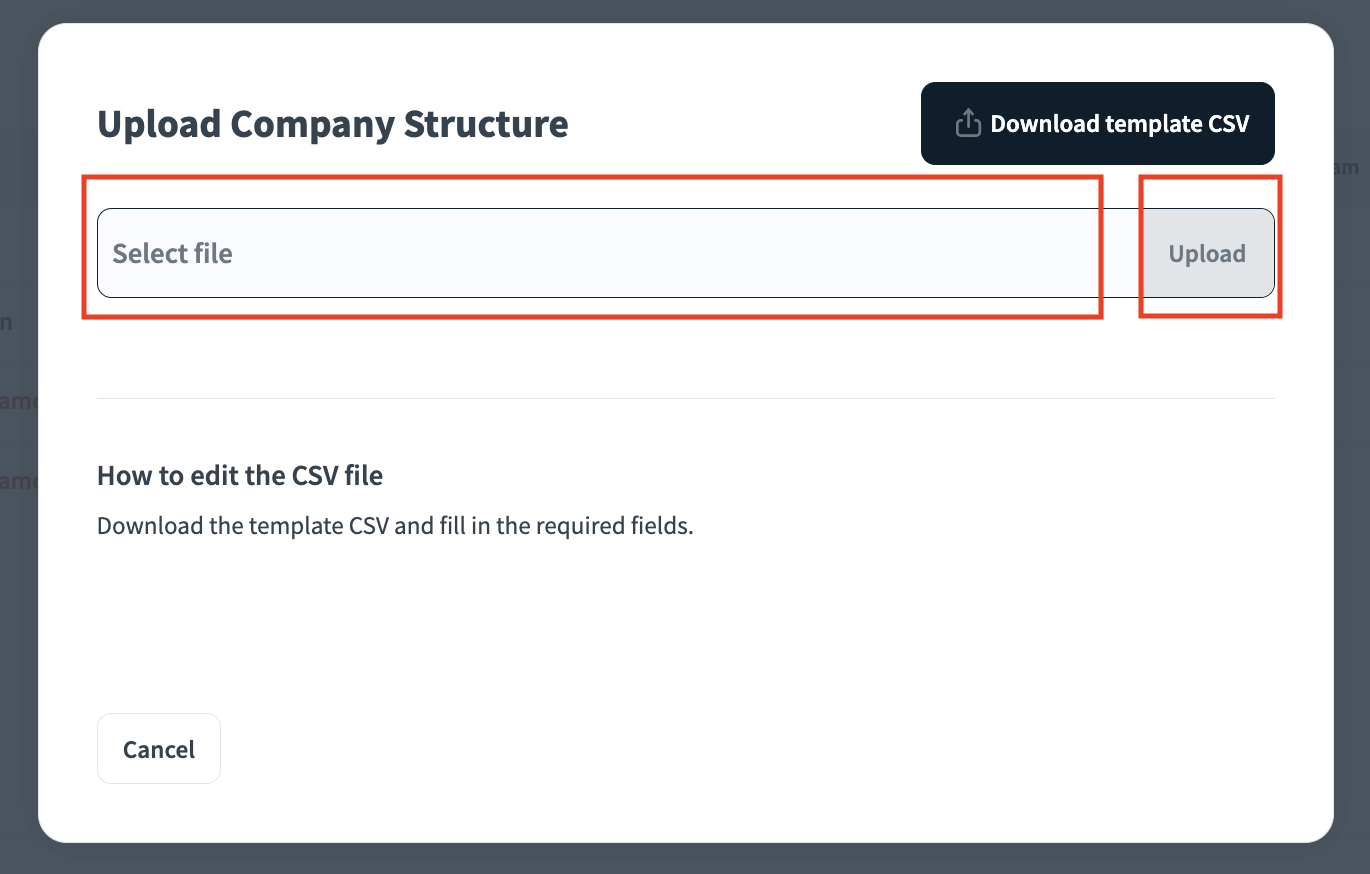
7. Confirm your CSV data is correct and save your file. Within the Upload Company Structure popup, click Select file and enter your relevant CSV. Click Upload to have Second Nature process the file for errors.
8. The popup should now indicate the number of new records and any changes to existing records stemming from the upload of your CSV file. If there were any issues with your request, it will be noted. Read the log provided of changes or issues found.
a. You may press Download .txt if you wish to keep a readable, text record of the potential changes to your account, or the issues based on your CSV file and current records.
In the example below, four test users were added:
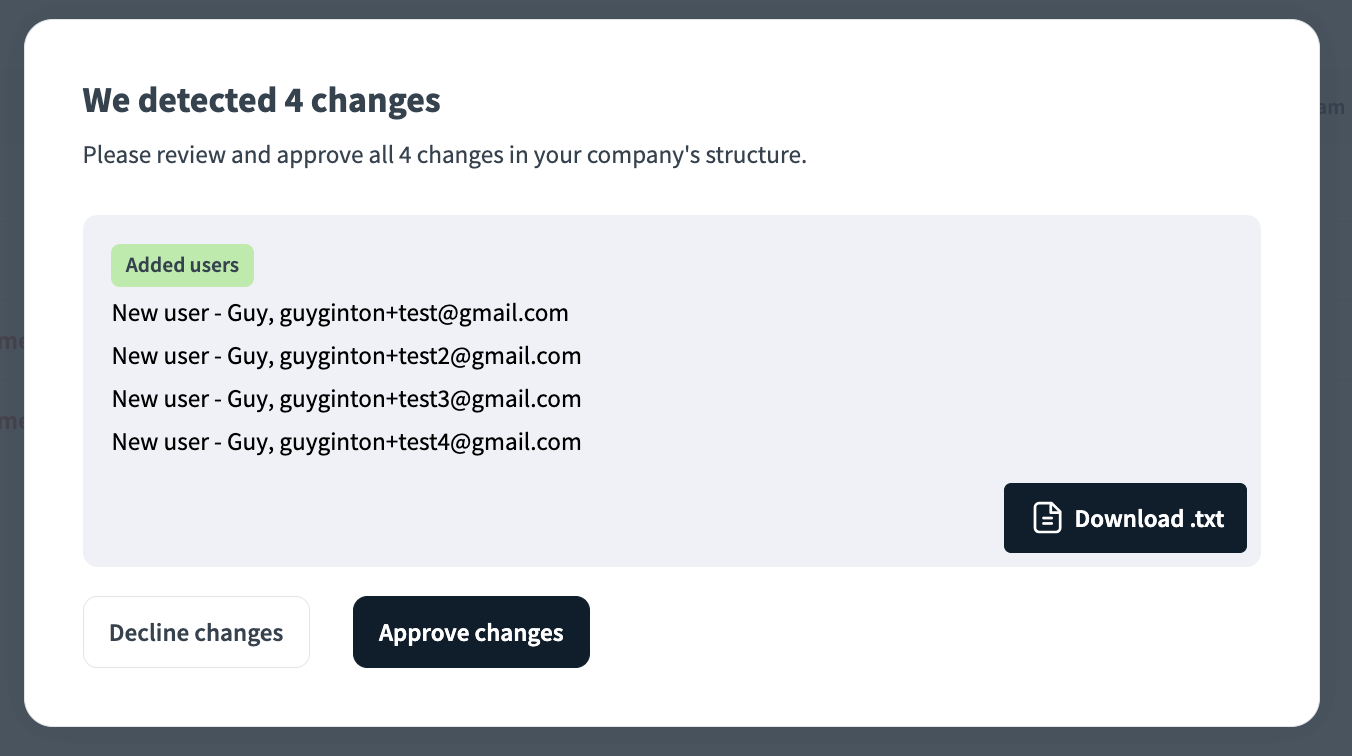
9. After you have confirmed the changes are what you expected, press Approve changes to complete the invite process. Invited users will receive an email to complete registration.
10. Within the Invite New Users page, confirm that the recently invited users were added.
TIP:
Now that you have added users, you may wish to read “Editing User Info (Account Settings)”.